DisplayHUB Device Setup
Here’s the full page code. Replace everything in the page’s UX Builder text/HTML element with it. It’s also saved at `Server\device-setup\device-setup-uxbuilder-code.txt`.
“`html Under the hood, DisplayHUB uses: Leave your current setup intact. Unlike traditional video matrix systems, you don’t need to rewire or relocate equipment. Place the controller anywhere, and set up each encoder right alongside your existing inputs, DirecTV boxes, or cable boxes. Free consultation services are available to large venues (20+ displays), or you can hire a local tech specialist for a few hours. The controller handles the web UI, discovery, routing, and upgrades. It does not require capture hardware. Encoders accept live HDMI, local video files, or remote video URLs. Self-installation requires basic computer knowledge, including downloading files, using SD card flashing tools, and identifying devices on a local network. No Linux or command-line experience is needed—you never log in to a Pi or type commands on it. If you are new to Raspberry Pi, please consult these general resources before beginning: Need Hands-On Assistance? Every DisplayHUB Pi must be plugged into your network with an Ethernet cable the first time it powers on—a freshly flashed Pi doesn’t know your WiFi, so that cable is how it gets online. After its first boot, it’s managed entirely through the web dashboard at http://displayhub.local or the controller’s IP address, where you can also move it to WiFi if needed. Already powered one on without the cable? Plug in the Ethernet cable, then restart the Pi by unplugging its power for a few seconds and plugging it back in.
Once the Wi-Fi panel shows it’s connected, unplug the Ethernet cable and restart the Pi (unplug its power for a few seconds). Its IP address will change, so reconnect at http://displayhub.local or look up the new IP in your router. If it can’t join your WiFi, plug the Ethernet cable back in and restart it to get back into the dashboard. Step-by-step guides: Controller WiFi · Encoder WiFi
Once connected, all inputs instantly appear as routable sources across DisplayHUB!
DisplayHUB Device Setup
Everything Happens in Your Browser:
Nothing happens at the terminal on any DisplayHUB Pi—it’s locked, and the DisplayHUB software is encrypted, so there’s nothing to log in to or type there. Once your Pis are flashed, plugged into your network with an Ethernet cable, and powered on, you set up and manage everything from a web browser at http://displayhub.local or your controller’s IP address.
Important Security Notice:
There are no passwords inside the DisplayHUB control layer. All Pis and players must reside on a private staff-only LAN—never on guest WiFi or public networks.
Build in Place; No Need to Rewire, Rebuild, or Move Anything
Installation Options
Supported Players




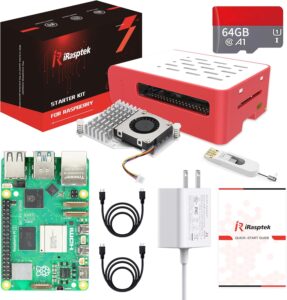
Step 1: Get Your Raspberry Pi Hardware
Controller Pi
Encoder Pis
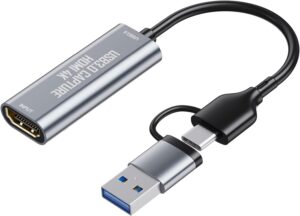
IMPORTANT: Plug the HDMI USB capture device into the upper-left USB port of the Pi 5.
Step 2: Prepare the OS and Networking
Flashing & Prerequisite Technical Knowledge
Please Note: We do not provide free support or instructions on general Raspberry Pi assembly, casing, or basic OS flashing.
Paid support, guided setup, and custom installation are available starting at $150 per hour. Contact our team to schedule.
Network Configuration
Need the image files? Contact us to request the downloadable custom firmware for your Pis.
Network Requirements:
Step 3: Connect Ethernet, Power Up, and Open the Dashboard
First Boot Must Be Wired
Plug each Pi into your network with an Ethernet cable before you power it on for the first time. A freshly flashed Pi doesn’t know your WiFi, so without that cable it can’t get online, can’t finish its first boot, and won’t show up in your browser. Your network also needs internet access, because each Pi activates its DisplayHUB software during its first boot.
Stay Wired (Recommended), or Switch to Your Own WiFi
Wired Ethernet gives you the lowest latency and the most reliable sync, so we recommend leaving your Pis wired. If a Pi needs to be on WiFi, set it up in your browser after its wired first boot:
Nothing Happens at the Terminal
If you connect a monitor and keyboard to a DisplayHUB Pi, you’ll only see startup text and a login prompt. That terminal is locked and the DisplayHUB software is encrypted—there’s no login for you to use, no commands to run, and nothing to install or configure there. You don’t need a monitor or keyboard at all: setup, WiFi, sources, displays, and updates are all handled in your browser at http://displayhub.local or the controller’s IP address.
Step 4: Connect Live HDMI, Files, or URLs