DisplayHUB Device Setup

Under the hood, DisplayHUB uses:

  • Controller Pi: One Raspberry Pi that runs the DisplayHUB dashboard.
  • Encoder Pis: One Raspberry Pi per input that can encode HDMI, video files, or video URLs.
  • Players: Your existing Smart TVs, Smart Devices, or inexpensive Android dongles. Simply search the device app store for DisplayHUB.

Important:
There are no passwords inside the DisplayHUB control layer. All Pis and players must live on a private staff-only LAN, never on guest WiFi or public networks.

Build in Place; No Need to Rewire, Rebuild, or Move Anything

Leave your current setup in place. Unlike most video matrix systems, you do not need to rewire or move anything. You can place the controller anywhere, and each encoder can be placed alongside your current inputs, DirecTV boxes, or cable boxes.

Free consultation services are available to large venues (20+ displays), or hire your local computer people for a few hours.

Installation Options

  • Self-install is very easy.
  • Hire the local computer shop for a few hours.
  • Use our guided installation services.
  • Hire us for on-site installation.

Players Supported


Roku


Android


Fire TV


WebOS
Samsung Tizen

Step 1: Get Your Raspberry Pi Hardware

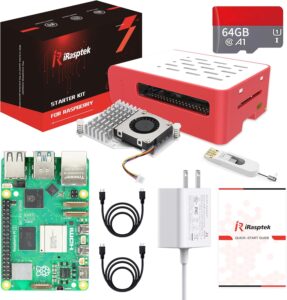
Controller Pi

  • Recommended: Raspberry Pi 5
  • 32 GB or larger microSD card
  • Flash our custom image, boot, and configure via the built-in web interface
  • Good-quality power supply

The controller handles the web UI, discovery, routing, and upgrades.
It does not need capture hardware.

Encoder Pis, 

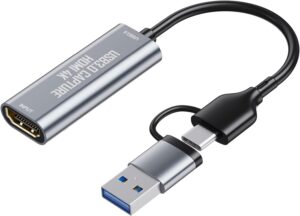
  • Same as the controller pi to the left but you will also need the HDMI to USB dongle below. 1 Raspberry Pi 5 per input (same lit as to the left).

  • 32 GB or larger microSD card

  • Flash our custom image and configure via the built-in web interface

  • HDMI capture device for live inputs (see below)

IMPORTANT: Install the HDMI USB device below into the upper-left USB port of the Raspberry Pi 5.

Encoders can take in live HDMI, local video files, or remote video URLs.

HDMI to USB 3.0 Video Capture Dongle


USB Capture


~10

Amazon

Step 2: Prepare the OS and Networking

Use an SD card imaging application like Balena Etcher to flash our custom firmware.

Once booted, you can manage everything through the built-in web dashboard.

Please contact us for a link to the downloadable images used to flash your Raspberry Pi SD cards.

Keep the Network Private

  • Connect all Pis and players to a private staff-only LAN or VLAN.
  • Do not place DisplayHUB devices on guest or public WiFi.
  • Prefer wired Ethernet for controllers and encoders.
  • Use DHCP reservations or static IPs for easier management.

DisplayHUB Networking Guide

Step 3: Connect Live HDMI, Files, or URLs

  • HDMI: Connect DirecTV, cable boxes, Roku devices, Android TV devices, media players, or PCs.
  • Video files: Place MP4 or similar files on the encoder Pi.
  • Video URLs: Configure the encoder with supported streaming URLs.
  • Use fixed resolutions and frame rates for best stability.
  • Confirm each encoder shows a live preview in the dashboard.

Once connected, all inputs appear as routable sources in DisplayHUB.